WoE TE
Overview
The training edition of the War of Emperium system is a more restricted version of WoE for Transcendent Classes and below. WoE TE recreates all 5 of the Valkyrie and Luina realm castles called Gloria and Kafragarten. The entrance of WoE TE castle realms are located in Valkyrie (prt_gld 120, 153) and Luina (alde_gld 225, 188)
WoE TE is a scheduled server-activated event enabled during certain periods of time.
Important Note: There may be frequent changes regarding skills and mechanics, depending on player feedback.
Times
- Castle Region 1 (Prontera): Saturdays 16:00 Server Time
Community and Guidelines
Community
Join our PvP Discord server to gain the latest informations, upcoming changes, and on-going discussions regarding anything in PvP.
Player Guides
Guides that are made by the community.
- Woe te classic infantry memoir by Tsukiko
- Soul Destroyer (SBK) Assassin Cross Build & Full Reduction Build Example by Meer
Restrictions
The rules of battle are generally the same as the original War of Emperium. All damage formulas and ally statuses are the same. Players must be a Transcendent class or Expanded class. Third class, Expanded Super Novice, Kagerou and Oboro players cannot participate in WoE TE. In addition to the disabled skills of War of Emperium, the following are disabled or have no effect in WoE TE. Disabled buffs/debuffs are also stripped from the player when entering castles.
Guild
- Alliances will be disabled
- Characters per Master Account among all Castle Maps will be limited to 1
- Characters per Guild among all Castle Maps will be limited to 24
Items
 All MVP Cards.
 Bloody Branch (12103)
 Dead Branch (604)
 Level 5 Assumptio Scroll (12218)
 Party Assumptio 5 Scroll (14590)
 Siege White Potion (11548)
 Siege Violet Potion (11547)
 Siege Blue Potion (11549)
 Savage BBQ (12429)
 Drosera Herb Stew (12433)
 Minor Brisket (12431)
 Warg Blood Cocktail (12430)
 Siroma Icetea (12432)
 Red Herb Activator (100232)
 Blue Herb Activator (100233)
 Golden X (100231)
 The One Potion (50035) (and all Potions contained within)
- All transformations scrolls / potions
Equipment
- Glorious equipment and weapons
- WoE equipment
- Bellum weapons
- WoE and WoE2 God Items
- All Advanced Shadow Gear (Blue colored)
- All Paradise Gear (Including Shadow Gear)
- All Trait Shadow Gear
- All Pets
Skills
- All Third class, Kagerou and Oboro supportive buff/debuff skills are disabled in WoE TE castles.
- The following skills below are also disabled.
| Disabled Skills | |||
Max Level: 5 Skill Form: Active Type: Supportive Target: Caster Cast Time: (Lv6+)None After Cast Delay: None Cool Down: None Description: Leaps to a targeted cell within the skill's range. So long as the targeted cell is accessable, the caster can leap over walls and obstacles. Leap cannot be used in areas where Fly Wings are disabled, except for WoE maps. Cast Time & Skill Range per Level [Lv 1]: 5 sec, 2 cells [Lv 2]: 4 sec, 4 cells [Lv 3]: 3 sec, 6 cells [Lv 4]: 2 sec, 8 cells [Lv 5]: 1 sec, 10 cells |
Max Level: 10 Requirement: Throwing Mastery 10, Throw Huuma Shuriken 5 Skill Form: Active Type: Special Physical Ranged Target: 1 Character Cast Time: None After Cast Delay: 5s Cool Down: None Description: Throws coins at a target to inflict an amount of Defense piercing damage equal to the amount of Zeny spent in the attack. This skill has 5 sec After Cast Delay, and it's damage is reduced against Boss monsters and in PvP area. [Lv 1]: 500~1,000 zeny [Lv 2]: 1,000~2,000 zeny [Lv 3]: 1,500~3,000 zeny [Lv 4]: 2,000~4,000 zeny [Lv 5]: 2,500~5,000 zeny [Lv 6]: 3,000~6,000 zeny [Lv 7]: 3,500~7,000 zeny [Lv 8]: 4,000~8,000 zeny [Lv 9]: 4,500~9,000 zeny [Lv 10]: 5,000~10,000 zeny |
Max Level: 5 Requirement: Flip Tatami 1 Skill Form: Active Type: Supportive Target: Ground Cast Time: None After Cast Delay: 1s Cool Down: None Description: Shadow Leap can only be performed when the caster is in Hiding status, which can be enabled by the Haze Slasher skill. This skill instantly moves the caster to a targeted cell, ignoring obstacles in the caster's way. [Lv 1]: Leap 6 cells [Lv 2]: Leap 7 cells [Lv 3]: Leap 8 cells [Lv 4]: Leap 9 cells [Lv 5]: Leap 10 cells | |
Max Level: 1 Requirement: Lord Knight Over Job Level 50 Skill Form: Active Type: Supportive Target: Self Cast Time: None After Cast Delay: None Cool Down: None Dispellable: Dispell, Clearance, Banishing Description: Enhance your physical ability to the limits for 300 seconds by using your rage. Upon casting Berserk, restore your HP to 100%, and reduce your SP to 0%. Effects of Berserk while it is active: [1]: Increase your MaxHP by 200%, [2]: Increase Normal attack damage by 200%, [3]: Increased Movement Speed, [4]: Increase ASPD by 30%, [5]: Ignore flinching effect when taking damage, [6]: Increase Scaling ASPD by 15, [7]: Can not use items, [8]: Chat is disabled, [9]: Can not change equipment. [10]: Can not cast skills (except autocasts), [11]: Can not be healed by most sources, [12]: Disable natural HP/SP regeneration, [13]: Lose 5% MaxHP every 10 seconds, [14]: Reduce Flee by 50%, [15]: Reduce DEF/MDEF to 0. |
Max Level: 1 Requirement: Musical Lesson 5, Requirement: Dancing Lesson 5, Improve Concentration 10 Skill Form: Active Type: Supportive Target: 1 Character Cast Time: None After Cast Delay: None Cool Down: None Description: Targeted party member receives a bonus to all Stats equal to half of the Stats of the caster. However, each of the target's Stats cannot exceed 99. This skill is canceled if this party member is more than 7 cells away from the caster. |
Requirement: Finish Quest Skill Form: Active Type: Supportive Target: Caster Description: Quickly move 5 cells backwards to position yourself safely away from threats. |
Max Level: 10 Requirement: Stone Curse 1, Frost Diver 1 Skill Form: Active Type: Supportive Target: Ground Cast Time: None After Cast Delay: None Cool Down: None Description: Creates a frozen wall of ice in 1x5 cells that will block enemies, but it can be destroyed using attacks. The HP of the Ice Wall depends on skill level and when placed, it's HP is reduced by 50 per second. It will disappear when it's HP reaches zero. [Lv 1]: Ice Wall HP: 400 [Lv 2]: Ice Wall HP: 600 [Lv 3]: Ice Wall HP: 800 [Lv 4]: Ice Wall HP: 1000 [Lv 5]: Ice Wall HP: 1200 [Lv 6]: Ice Wall HP: 1400 [Lv 7]: Ice Wall HP: 1600 [Lv 8]: Ice Wall HP: 1800 [Lv 9]: Ice Wall HP: 2000 [Lv 10]: Ice Wall HP: 2200 |
Rental Gear System
Special Rental Equipments are provided for 24-hours period that can only be used in WoE:TE. Common traits are extra damage/resistance against other player and frozen resistance.
Mechanics
GvG Reduction
| Type | % |
| Melee | 20% |
| Ranged | 20% |
| Physical Skills | 60% |
| Ranged Skills | 60% |
| Misc Skills (Fixed Dmg) | 60% |
Resistance
- Size, Race, Class, Long Range Resists are capped at 90%.
Emperium
- Plant protocoll 700 HP
Adjusted Skills
Assassin Cross
 Soul Destroyer will deal -60% damage
Champion
 Asura Strike will deal +100% damage
Ranger
 Sharp Shooting will deal -50% damage
Paladin
 Pressure will deal -60% damage
TE Potions, Quests
TE Potions
- There are some cheap Potions available for WoE TE:
 TE White Potion (11557)
  TE White Slim Potion (11558)
 - You can buy them at TE Potion merchant in either:
- warp to Gloria 3 and walk left or (te_prt_gld 114, 153)
- warp to Kafragarten 4 and walk a bit downwards or (te_alde_gld 215, 184)
Quests
- There are 3 types of quests that can only be accepted once during each WoE TE:
- Destory Emperium X times
- Kill Baby Boblin/Poring X times
- Collect X Amount of
 Small Wooden Box (6592) (Gloria) or
  Kafra Employee Paystub (7056) (Kafragarten)
 - (You can find the npc next to the TE Potion vendor of the corresponding map)
- As a reward for these quests you will get some TE Potions
- Those can be exchanged into various WoE related items you can find the machine in Gloria next to the potion dealer. (te_prt_gld 114, 153)
Rewards
Participation Reward
Participating in WoE TE will grant players the following rewards:
- 5x
 TE Treasure Box (50083) (depending on participation)
 - up to 500x
 War Badge (7773) (depending on participation)
More ![]() TE Treasure Box (50083) will be rewarded depending on:
TE Treasure Box (50083) will be rewarded depending on:
- Any emp break during WoE gives +1
 TE Treasure Box (50083) to all participants (only works once)
 - Castle Holding Streak (castle owner is the same as last week at the end of WoE regardless if the emperium breaks or not)
- Castle Defense Streak (emperium of the castle holder didn t break at the end of WoE)
There is still a requirement to get this participation rewards, e.g. actively taking part on the WoE and not being AFK.
WoE Exclusive Costume
By trading ![]() Siege Guild Coin (6615) at (bat_room 165, 144), players can choose one of the costumes below:
Siege Guild Coin (6615) at (bat_room 165, 144), players can choose one of the costumes below:
| - | |||
|---|---|---|---|
Despite being named "WoE Exclusive Costume", these costumes are actually tradeable but the only way to obtain ![]() Siege Guild Coin (6615) is by actively participating in WoE.
Siege Guild Coin (6615) is by actively participating in WoE.
Godlike Crafting Guide
Requirements
- In order to build either
 Hervor (2181) or
  Jormungand (2020) you need to conquer either Gloria 1 or Kafragarten 1. ( Gloria/Kafragarten 2-5 don't have the NPC!)
 - The Castle needs a commercial invest of at least 30. (The Invest will drop by 20 points once the quest is started)
- Only Players can enter the Castle with Lvl 99 or below and 2nd job class or below.
- All of the respective Materials are needed in order to start the Quest:
Important Note: The Blacksmiths will take any Valk Shield/Staff in your Inventory, so be sure you have only 1 with you when you want to craft it!
- You can craft the
 Muspellium (6605) and
  Essence of Rune (6604) at the same NPC you build the God Item:
- They are in the Emperium Room of Kafragarten 1 / Gloria 1
- (te_prtcas01 204, 204)
- (te_aldecas1 226, 34)
- The God Item Parts can be found inside the Treasure Boxes in the following Castles:
| Castle Number | Name | Entrance | Dungeon Entrance | Entrance Object | Godly Drop |
| Gloria 1 | Gaebolg | (131, 65) | (96, 200) | Podium | |
| Gloria 2 | Richard | (240, 126) | (83, 72) | Statue | |
| Gloria 3 | Wigner | (153, 139) | (5, 70) | Statue | |
| Gloria 4 | Heine | (109, 240) | (56, 281) | Bull's Head | |
| Gloria 5 | Nerious | (210, 240) | (213, 94) | Weapon Shelf | |
| Kafragarten 1 | Glaris | (49, 81) | (212, 179) | Statue | |
| Kafragarten 2 | Defolty | (95, 251) | (194, 139) | Statue | |
| Kafragarten 3 | Sorin | (142, 83) | (199, 177) | Statue | |
| Kafragarten 4 | Bennit | (241, 242) | (75, 64) | Book | |
| Kafragarten 5 | Leilah | (261, 90) | (23, 207) | Fountain |
Castle Invasion
- Once all the Materials have been gathered the Guild Leader must speak with Blacksmith Kai in Gloria 1 if you want to make a
 Hervor (2181) or with Blacksmith Cano in Kafragarten 1 if you want to make a
  Jormungand (2020)
 - (Note only the Guild that owns the castle can initiate the Raid and build the God Item. Other Guilds can enter the castle and help but they can't craft the God Item even if they have the Materials)
- An announce will appear that the castle will be stormed in 10 min.
- After the 10 min have passed all Players will be kicked out of the Castle and the Monsters will spawn within.
- In order to complete the Raid the Guild must defeat all of the Waifu Minibosses within 1 hour. (starting after the Monsters spawned.)
- In each Level of the Castle will spawn Multiple MVP's, Special "Guardian" Monsters, and Normal Monsters. (The MVP's have Green aura effect!)
- (The MVP's are optional and don't need to be defeated in order to progress but they are very anoying.)
- In order to spawn the Waifu MiniBoss all of their "Guardian" Monsters must be defeated.
- The Normal Monsters will respawn roughly every 5min.
- You can use Guild skills and Flag warp during the Raid to warp directly to Area3, but you have to complete Area 1, 2 and 3 before you can enter the Emperium Room. (The Flag warp might be crowded)
- Below is a list of the Monsters:
- Area 1:
| Guardians | Normal Monsters | MVP's | Waifu |
 Imp (1837) |
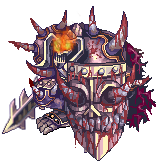 Bloody Knight (1268) |
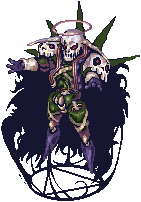 Dark Lord (1272) |
 Aira (2443) |
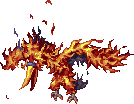 Kasa (1833) |
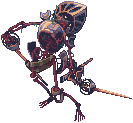 Khalitzburg (1132) |
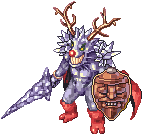 Knight of Windstorm (1251) |
 Kuluna (2444) |
 Salamander (1831) |
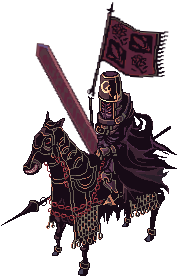 Abysmal Knight (1219) |
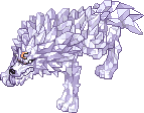 Garm (1252) | |
 Gajomart (1309) |
 Raydric (1163) | ||
 High Orc (1213) | |||
 Blazer (1367) | |||
 Despero of Thanatos (1705) | |||
 Odium of Thanatos (1704) | |||
 Dolor of Thanatos (1707) | |||
 Marionette (1143) | |||
 Plasma (1693) | |||
 Flame Skull (1869) |
- Area 2:
| Guardians | Normal Monsters | MVP's | Waifu |
 Naga (1993) |
 Bloody Knight (1268) |
 Dark Lord (1272) |
 Mallina (2445) |
 Ferus (1717) |
 Khalitzburg (1132) |
 Ezella (2446) | |
 Hillsrion (1989) |
 Abysmal Knight (1219) |
 Lune (2447) | |
 Plasma (1695) |
 Raydric (1163) | ||
 Tendrillion (1991) | |||
 Assaulter (1315) | |||
 Gazeti (1778) | |||
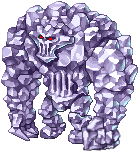 Ice Titan (1777) | |||
 Aqua Elemental (2016) | |||
 Rhyncho (2020) | |||
 Phylla (2021) | |||
 Dimik (1671) | |||
 Kavac (1656) | |||
 Gemini-S58 (1681) | |||
 Breeze (1692) |
- Area 3:
| Guardians | Normal Monsters | MVP's | Waifu |
 Shelter (1701) |
 Bloody Knight (1268) |
 Morin (2448) | |
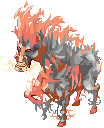 Nightmare Terror (1379) |
 Khalitzburg (1132) |
 Nasarin (2449) | |
 Mysteltainn (1203) |
 Abysmal Knight (1219) | ||
 Ogretooth (1204) |
 Raydric (1163) | ||
 Executioner (1205) | |||
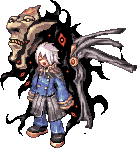 Kiel (1733) | |||
 Centipede (1987) | |||
 Ungoliant (1618) | |||
 Dark Pinguicula (2015) |
- Emperium Room:
| Guardians | Normal Monsters | MVP's | Waifu |
 Bloody Knight (1268) |
 Dark Lord (1272) |
 Aira (2443) | |
 Khalitzburg (1132) |
 Knight of Windstorm (1251) |
 Kuluna (2444) | |
 Abysmal Knight (1219) |
 Garm (1252) |
 Mallina (2445) | |
 Raydric (1163) |
 Ezella (2446) | ||
 Lune (2447) | |||
 Morin (2448) | |||
 Nasarin (2449) |
- Once all 7 Waifu are defeated a portal to the Emperium Room will Open.
- All 7 Waifu are spawned within the Emperium Room again. Once these 7 are defeated the Raid is over and all other Monsters will die.
- The Guild Leader can now talk to the blacksmith (while holding the required items) and craft the God Item.
Tips
- It is recommended to do this quest with at least 6+ ppl. (It can be done Solo but it may be hard to do so.)
- Using an
 Alice Card (4253) Shield significantly bolsters your defense against MVP's and Waifu Monsters.
 - Also having a
 Marc Card (4105) and a corresponding
  Saphien's Armor of Ocean [1] (2347) will help against Garm and Stormy Knight, and a
  Pasana Card (4099) against Dark Lord.( Land protector will help as well. )
 - If you can't kill the MVP try running quickly past them and completly ignore them as much as possible.
- If your party Members can't join up try using Emergency Call to instantly call all guild members to you.
- Or use the "Flag of Assault" to put down a flag so others can warp to the flag multiple times with "Charge shout Beating".( As long as the guild Leader doesn't leave the castle or die, the flag will stay for several minutes.)
Ranking
The top ranked player in War of Emperium TE is now displayed in Neustadt (neustadt 182, 141) next to the top ranked player for Battlegrounds.
The NPCs in Neustadt will wear the same costumes and styles as the players.
You gain ranking by completing WoE objectives. More information on this, including the web leaderboard, will come at a later date.
In the Main Office Basement, you can open your personal training room with the NPC Gatekeeper.
(main_office:105 188, )

In the training room you can test different builds against different monster settings.
You also have the opportunity to prepare for WoE and make various settings.


